Wednesday, April 24, 2013

A space of HER own!

Haven't been able to blog since the move to Texas, but so excited to be able to get my hands on the new house!  I so wish I was able to stick with one room at a time, but if I get an idea in my head, I just have to dive right in!  I've been decorating the study in our home, which has become my own personal space that I will use as my office/craft room and I am pumped!  Since my husbhand has an office the size of this whole house, and doesn't really work from home, I have staked my claim to the room.  Below is a sneak peak of a few projects that I am working on or have completed:


The whole inspiration for the room started with this
picture and an orange candle stick.  I knew I wanted
a punch of color, but needed to keep some black in
the room due to an oversized black armoire I already had
in the room.
 
Then I decided to include a punch of aqua.....


Amazing what a little fabric behind
picture frames can do, probably
putting a gold "D" in the middle
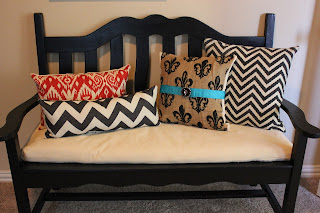
Recovered Pillows and cushion
 
Picked up some new self adhesive lamp shades
and recovered them with some fabric remenents
and leftover nailhead trim from a previous project.
A small simple desk given to me by a friend
painted black.  Currently looking for a chair
to go with it, and it as missing a knob, so
thinking of changing all the hardware out.
The folding screen had a makeover as well with
coordinating fabrics.  I will use this as a giant
bulletin board.
Gallery Wall in the making.  Decided to hold
off on painting the walls right now, simply because
I am wore completely out with painting the
old house before we put it up for sale.
Keeping it neutral for a while!
On the hunt for a few more things
for the room....chair, chandelier and maybe a rug
so stay tuned!


Saturday, July 21, 2012

Summer Projects


Hope everyone's Summer has been fun!  It's been quite a while
since I've posted anything to my blog, so much going on this past year
but thankful to fit in a few fun projects. As you know by now I love repurposing
old things around the house, or from a thrift shop.  I always have my eyes
open for the unusual that has potential!  Below are some projects
I have recently completed:

First of all, how many times have you
passed up this eye sore at a thrift shop
or garage sale?  For $2 plus some old
paint, stencil and nailhead trim I had lying
around the house from previous projects
I came up with this cute sign for the
front porch.
BEFORE:

AFTER:

I had 2 of these parsons chairs
in the garage that I wasn't sure
where to put them or could
never find a cute slipcover for,
other than solid colors....so
I reupholstered them with
painters drop cloth from Lowes,
ironed on a "D" with printer
iron on sheets, and added
some leopard print fabric with
nailhead trim to the backs.  They
found a home in the corners of my
Dining Room.
BEFORE:
AFTER:


So many times I have started a project
and forget to take "before" pics, I caught
this shelf as I started painting white.
I found it at our local thrift shop for $20
It was dark brown all over.  I needed
some toy storage for my baby girls room.
After painting, I sprayed some adhesive to
the backs of the shelves and applied different
print fabrics to it.
BEFORE:
AFTER:

This Brass chandelier I found at
a resale shop in Dallas.  I removed
all the wiring and sprayed it white
for my patio.
BEFORE:
AFTER:

OK.......I don't even know what
to call this, all I know is it is a
wooden support frame that
came with my Sisters crib that
she custom ordered.  They
were throwing away 2 of them
and I thought just maybe I could
do something with it.  I ended
up covering one of them with
fabric and ironing on a
saying for my baby girls room.
Those printer fabric sheets sure
do come in handy!  I haven't
figured out what to do with the
other one yet.
BEFORE:

AFTER:
(My camera seemed to focus on
the chevron stripes, so I took
another close up, sorry it
might look blurry, but it
doesn't look like that in person -
it's way cuter :)


Another Thrift Shop find....6 of these little white
plates.  Thanks to Pinterest, got a good
idea on how to print off and make silhouettes.
I decopouged them onto the plates and
tied with tulle.  Below is the
grouping I made on Elle's wall.
BEFORE:

AFTER:

I chose to print 4 Disney Princess silhouettes,
but you can do anything you like!

Thursday, April 12, 2012

Fabulous Finds for my Dining Room Makeover!

Below is a China Hutch I bought at Good Will for $150, in this pic I have already
taken it apart and removed the ugly chicken wire from the glass.   


 Above is a table and chairs that I bought off of a friend,
who bought it on Craig's List for $160.  So happy she sold it to me!
Below is the "after" along with painting I made
chair covers in leopard print with skirting made
out of painters drop cloth (found at Lowe's) super
cheap and love the linen look!


 I lined the back of the china cabinet with a silk
green fleur de lis print fabric, just made a template
out of wrapping paper, and used spray adhesive
to stick on the fabric.


I will repaint the Dining Room later, obviously I had
a lot of red accents and dark wood furniture before,
ready for something fresh and new, but got
to get the feeling back in my arms first!

Friday, January 13, 2012

What goes up must come down!

I literally hate taking down my Christmas decorations. I always seem to forget how to get everything back in its place. The house looks so bare, so I am taking it one room and one wall at a time, with probably many trips to Hobby Lobby in between. Here are some before and afters:
 Above, my hallway decorated for Christmas
and below is after.  I'm not sure if I'm done
it's a little off scale, but this wall can't take
many more nail holes!


 Above is my Dining Room buffet all decked out
for Christmas, below is what it looks like now.


 Since I love to repurpose things around the house
for the holidays, I took out the Christmas cutout and removed
the glass from the frame above and added a crown below

 Above - Christmas, Below - Everyday

 I found this crown and angel ornament
at Garden Ridge.  I hot glued it to
the middle of these plates from Hobby
Lobby.
 Below is a wall grouping above my Sofa


 Above - Christmas, Below - Everyday

Monday, December 5, 2011

Finally Finished, now if only the weather would cooperate so we could finish outside!

Living Room Tree

New Ornaments in Red and Gold I picked up this year

Pretty much obsessed with this wide velvet ribbon
I picked up from North Pole City, unfortunately I had my
husband go to the front to pay for it while I looked around,
he was not happy with the price, but it is worth every
penny!  Wish you could see the bling, it looks like
little diamonds and really sparkles!
First year to have the TV on the mantle,
so left me very little room on each side for
decorations.  This is what is on the left side

I've had the tall gold candle holders
in the garage for a while now, so I made
Christmas topiaries with them.
The ribbon in the garland I bought about 6 years
ago from Hobby Lobby.  Wish I had bought more
since I can't find it anywhere!  It's one of my favorites!

The skinny tree in the foyer

A light up snowman that made a great tree topper!
Ceiling in the foyer

Foyer table


Hallway decorating, I really don't
like the little sign in the middle, I might
take it down, it just doesn't have
a home yet.
The entrance to my Laundry Room


More hallway decorating


Related Posts Plugin for WordPress, Blogger...